Jump to Installation Section:
Product Support Rods - Magazine Side Plates - Magnetic Catch Tray - Full Video Tutorial
To keep shipping economical, friction feeders are often shipped partially assembled so that the feeder and its components can fit in a smaller box. Installing the friction feeder parts and components is easy to do yourself. Most can be installed with just one person.
In the Box:
- Friction Feeder with attached Discharge
- Hex Keys
- Product Support Rods
- Magazine Side Plate
- Magnetic Catch Tray
The recommended order of installation is product support rods, magazine side plate, and Magnetic Catch Tray. This article talks specifically about installing parts of an ip3 series friction feeder for more details on installation, consult your Operators Manual. If you need guidance for other friction feeders or have any other questions please contact our Customer Support.
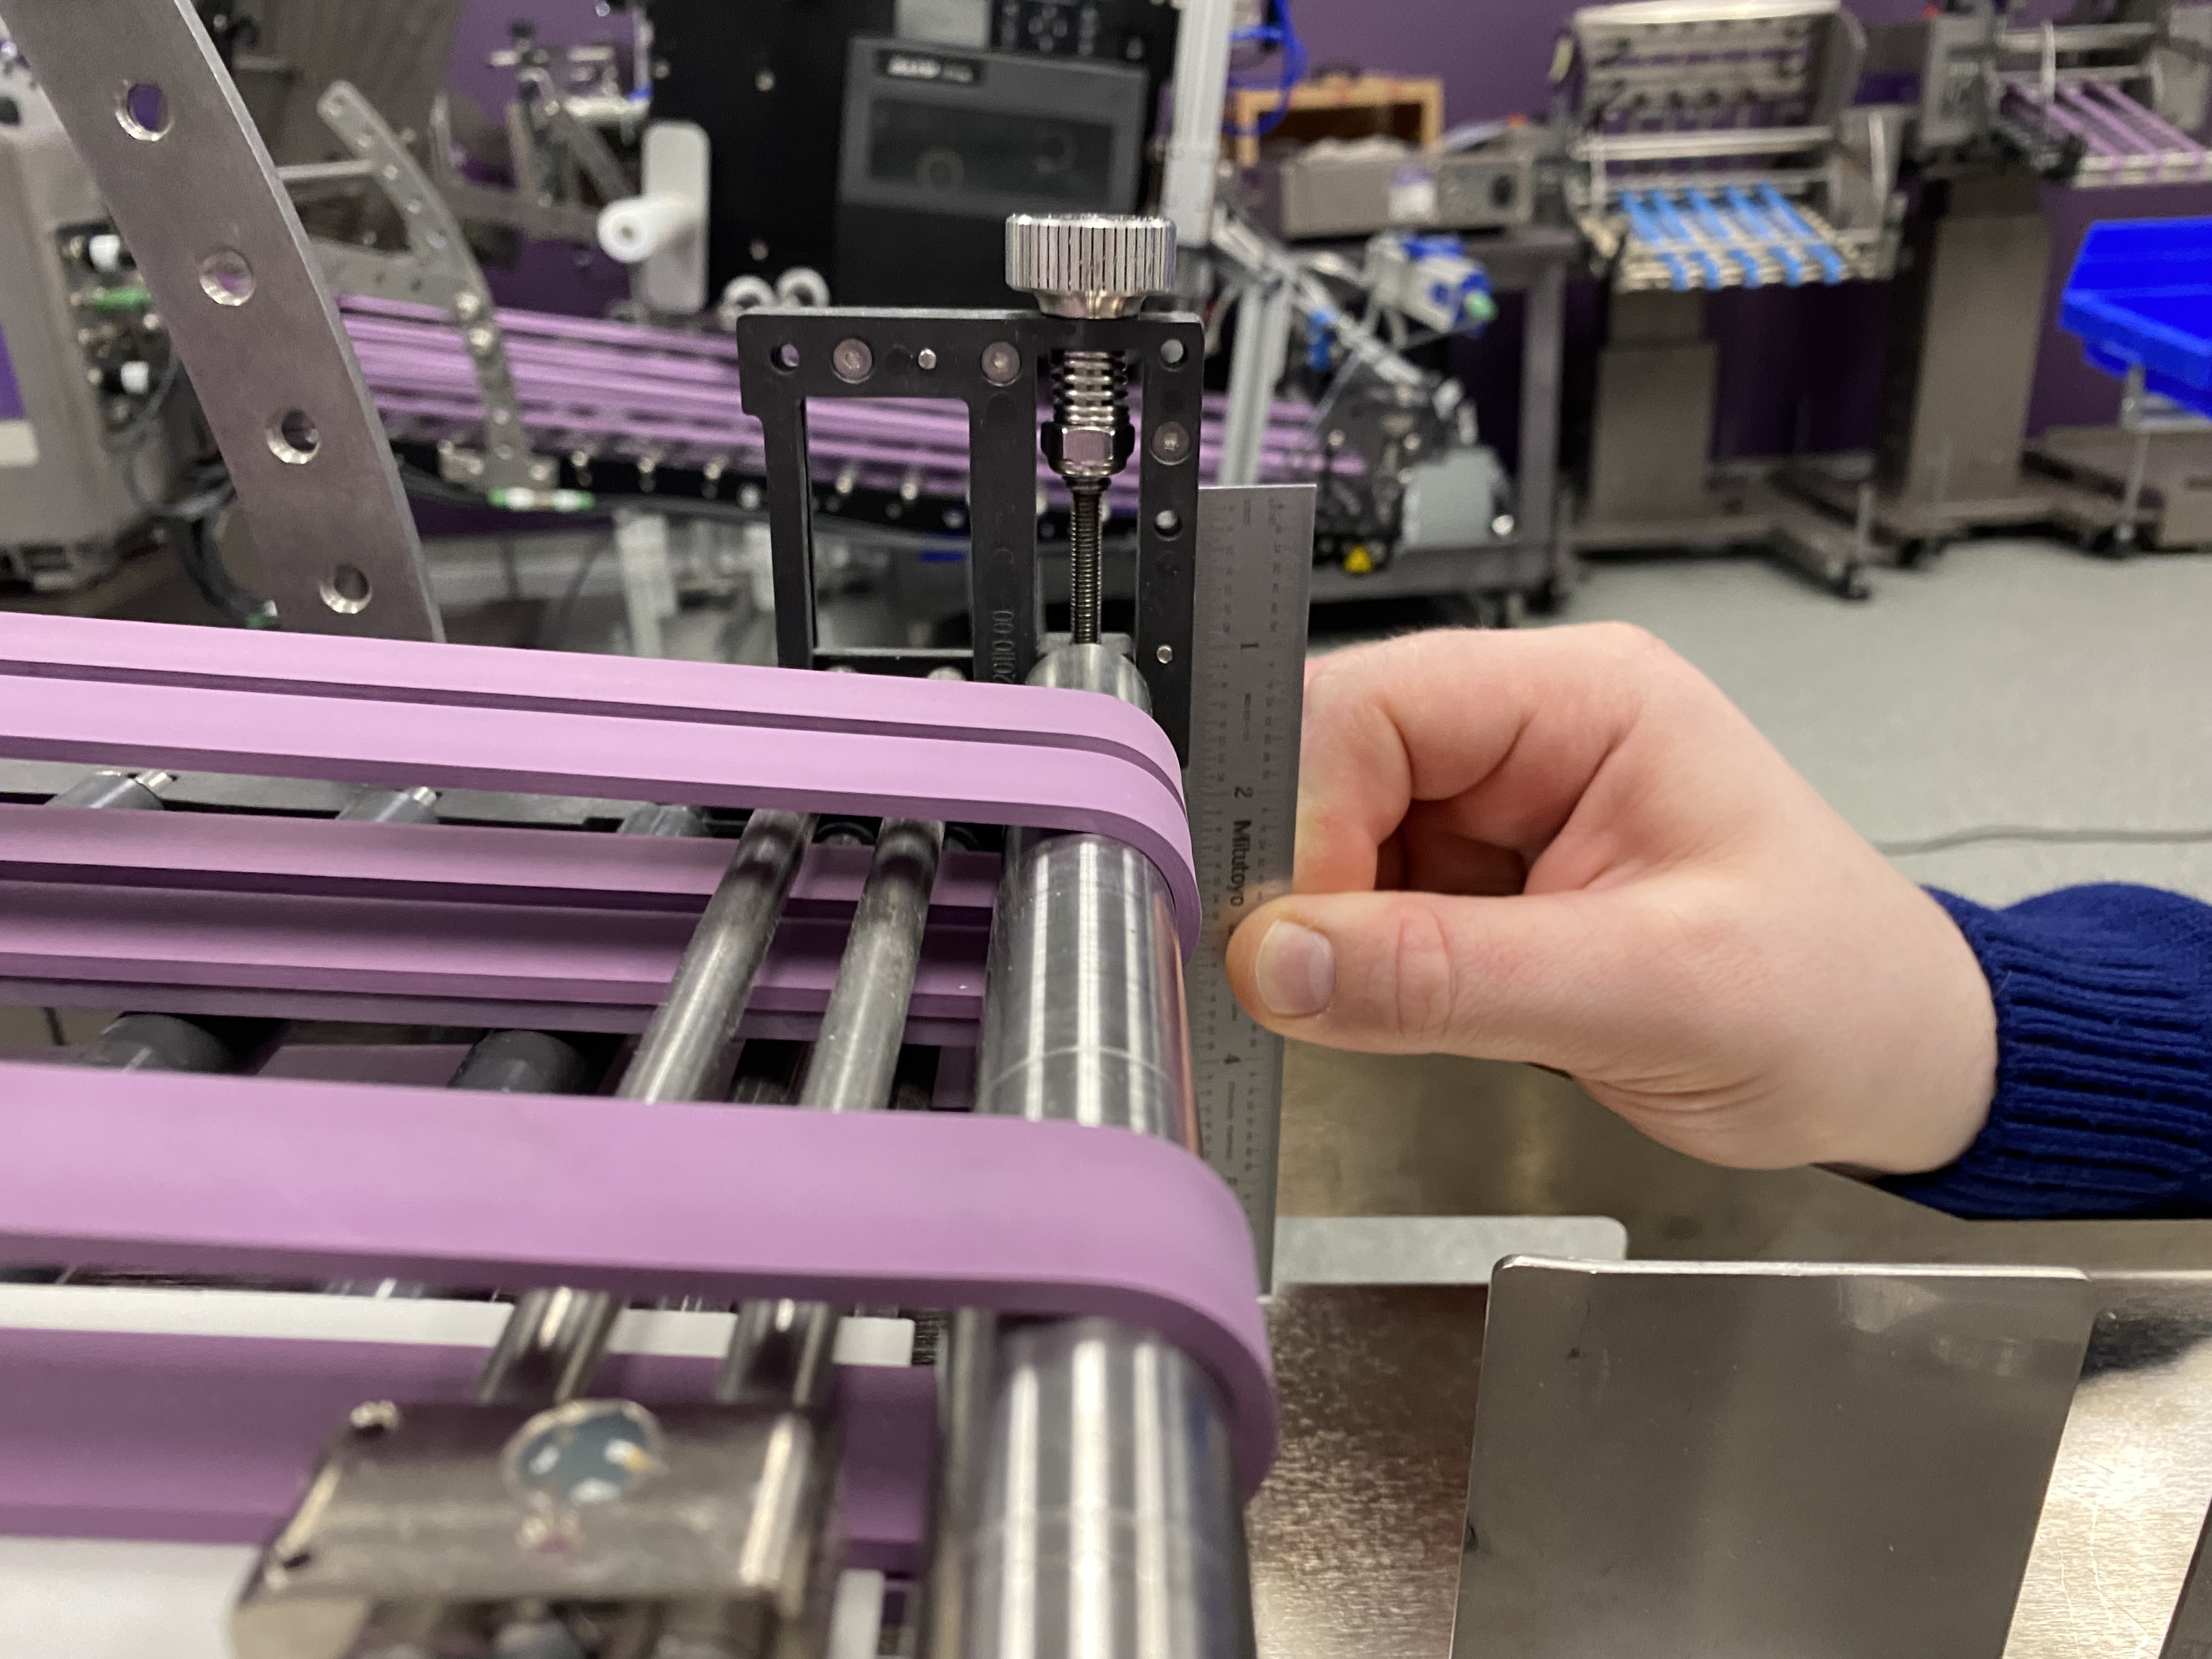
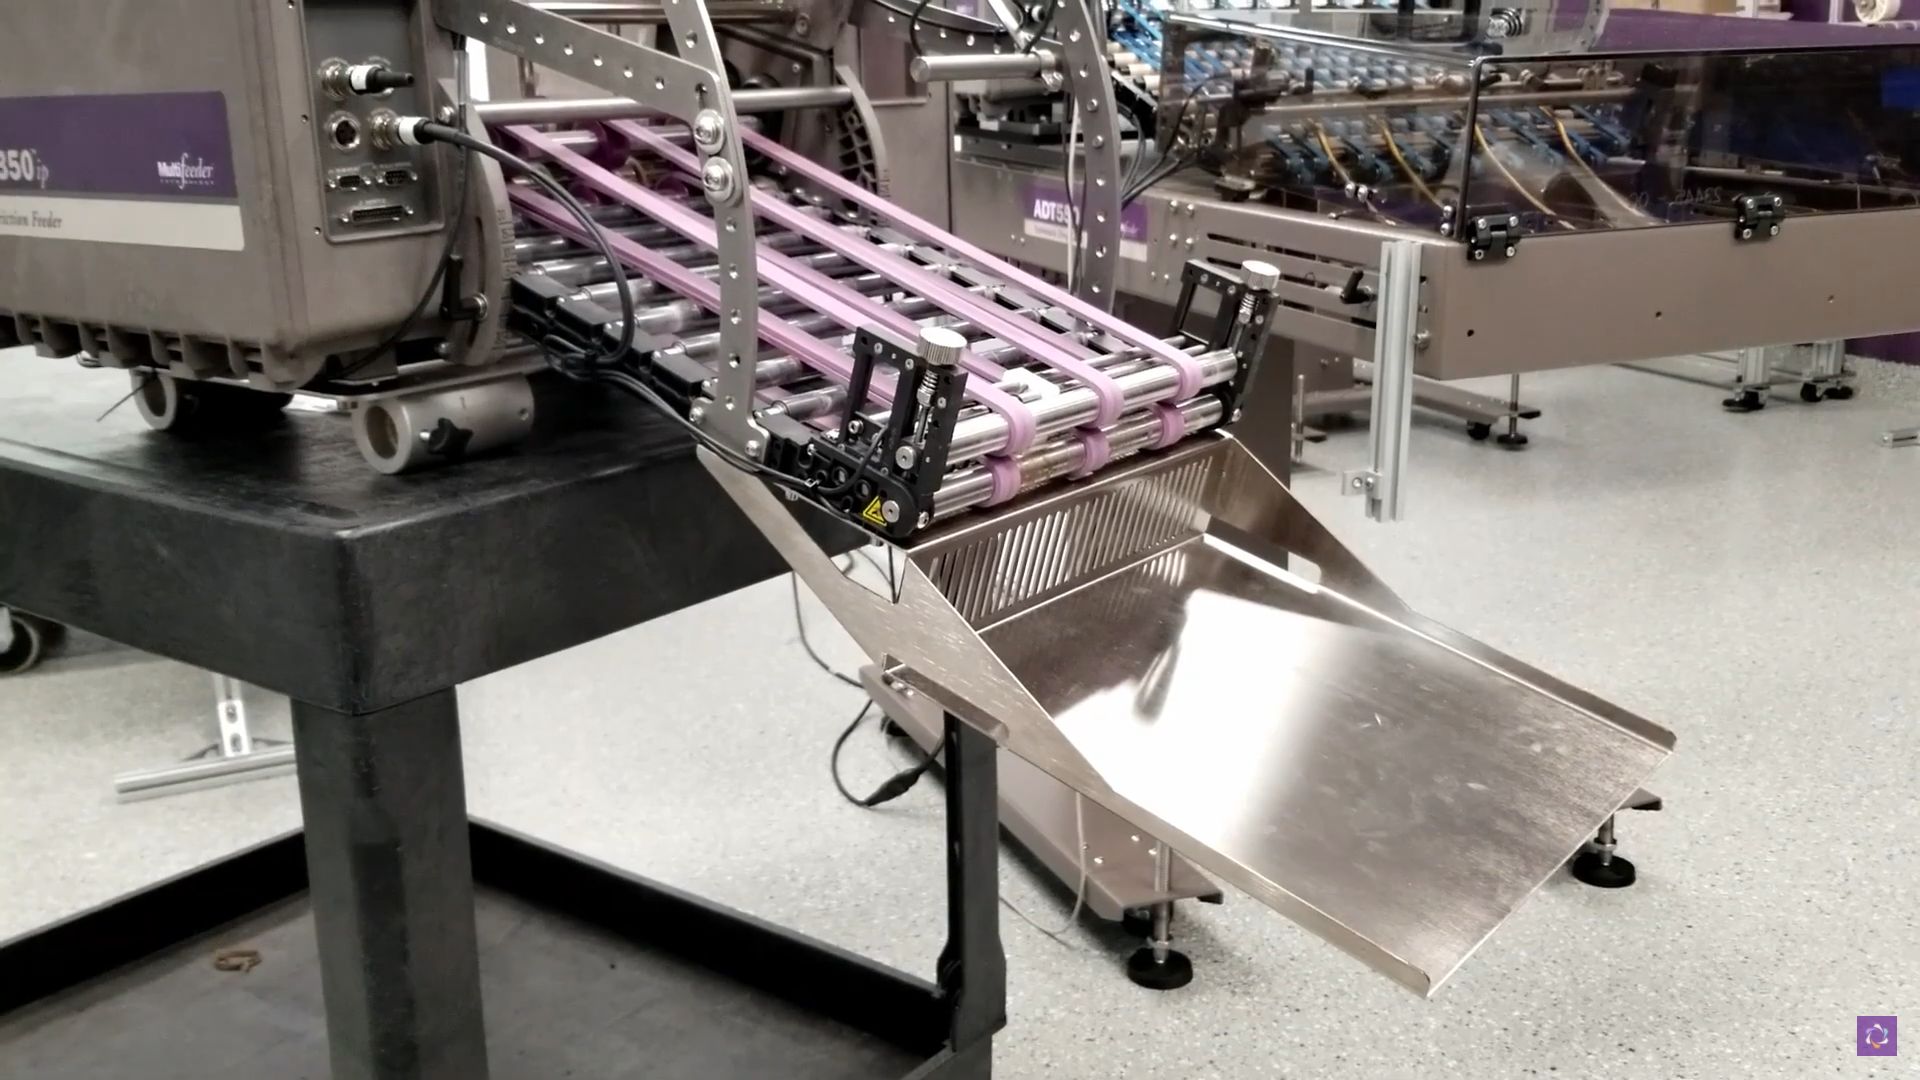
Installing Product Support Rods
The product support rods are long, stainless steel rods that reinforce the product stack in the infeed of the friction feeder. To attach your product support rod to the machine first loosen the fasteners on the composite bracket. Use a four-millimeter (4mm) hex key to unscrew the fasteners from the rod. Once completely loose, the front portion of the bracket will come free from the rod. Mount the support rod to the two horizontal bars at the top of the feeder’s infeed.
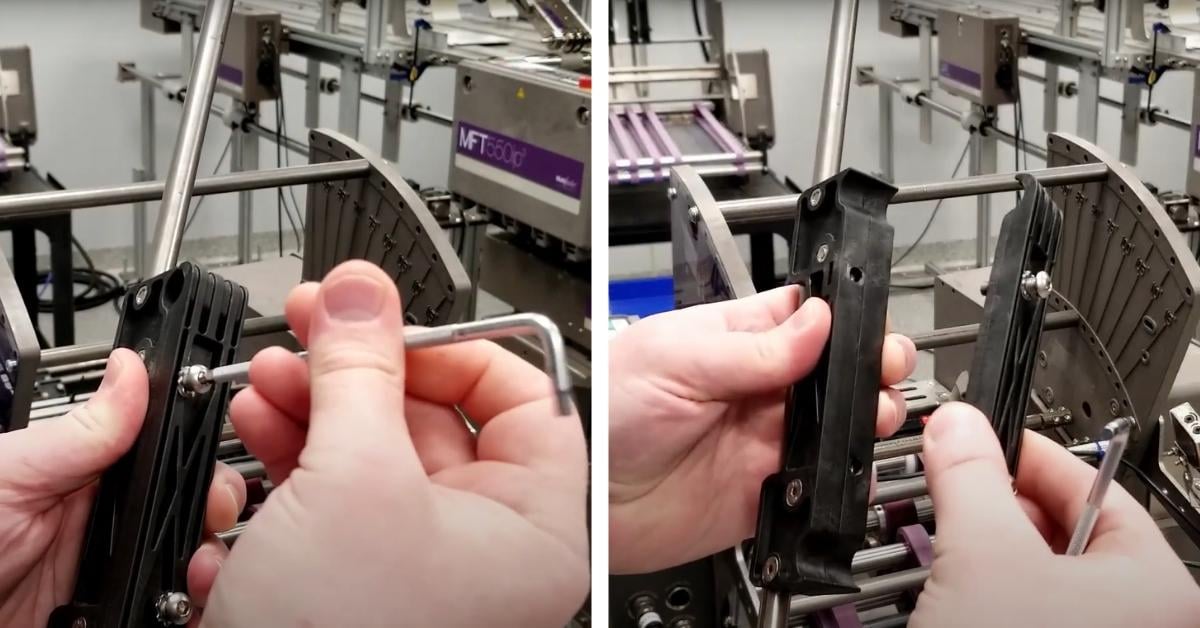
Refasten the front portion of the bracket to the mounted bar and leave it loose so that it can slide back and forth on the bars for easy horizontal adjustment. For every feed belt, there is one support rod. Our standard guideline is to center the support rod in-line with the feed belt track. After positioning the support rods over the feed belts, tighten the fasteners fully to lock them in place on the horizontal rods.
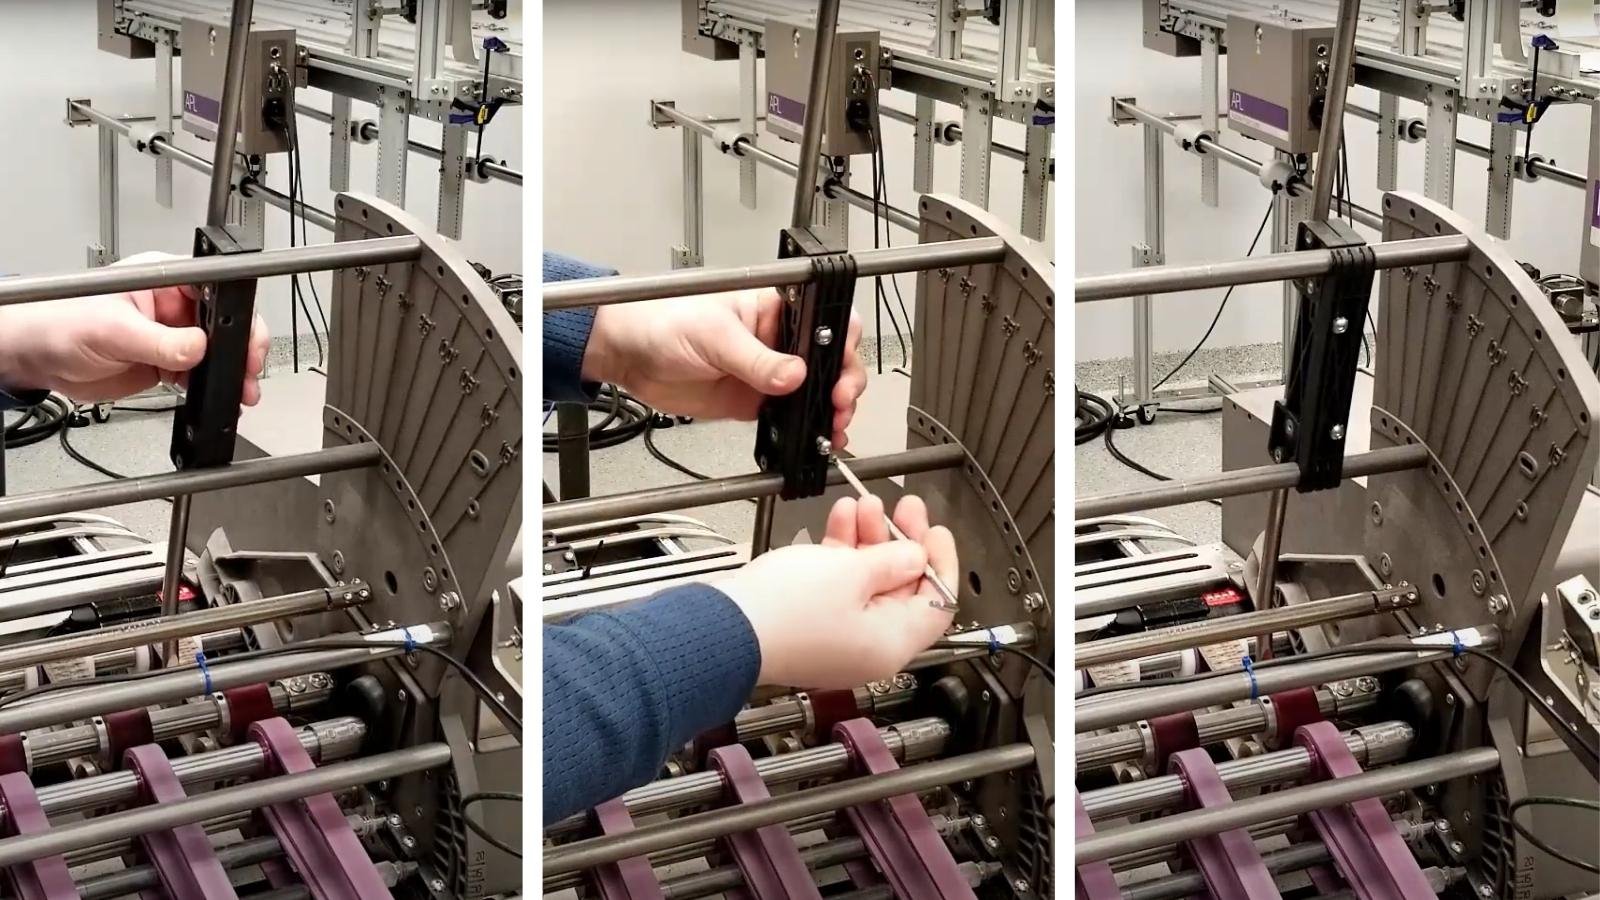
The vertical position of the support rods is also adjustable to allow clearance for the products to go underneath the support rods into the feeder. To move the support rods up or down, locate the fasteners on either side of the support rods. Use a three-millimeter (3mm) hex key to loosen these fasteners and adjust the rods to the desired height. Our standard guideline is to position the rods at a minimum of one product thickness above the belt and ideally rods should be the height of 3-4 products. Consult your Operators Manual or contact our Customer Support for more guidance. It is important that the rod height is high enough for clearance of the belt and product but not too high that it damages the stripper wheels. After adjusting to the correct height, tighten the fasteners to secure and lock the rods into place.
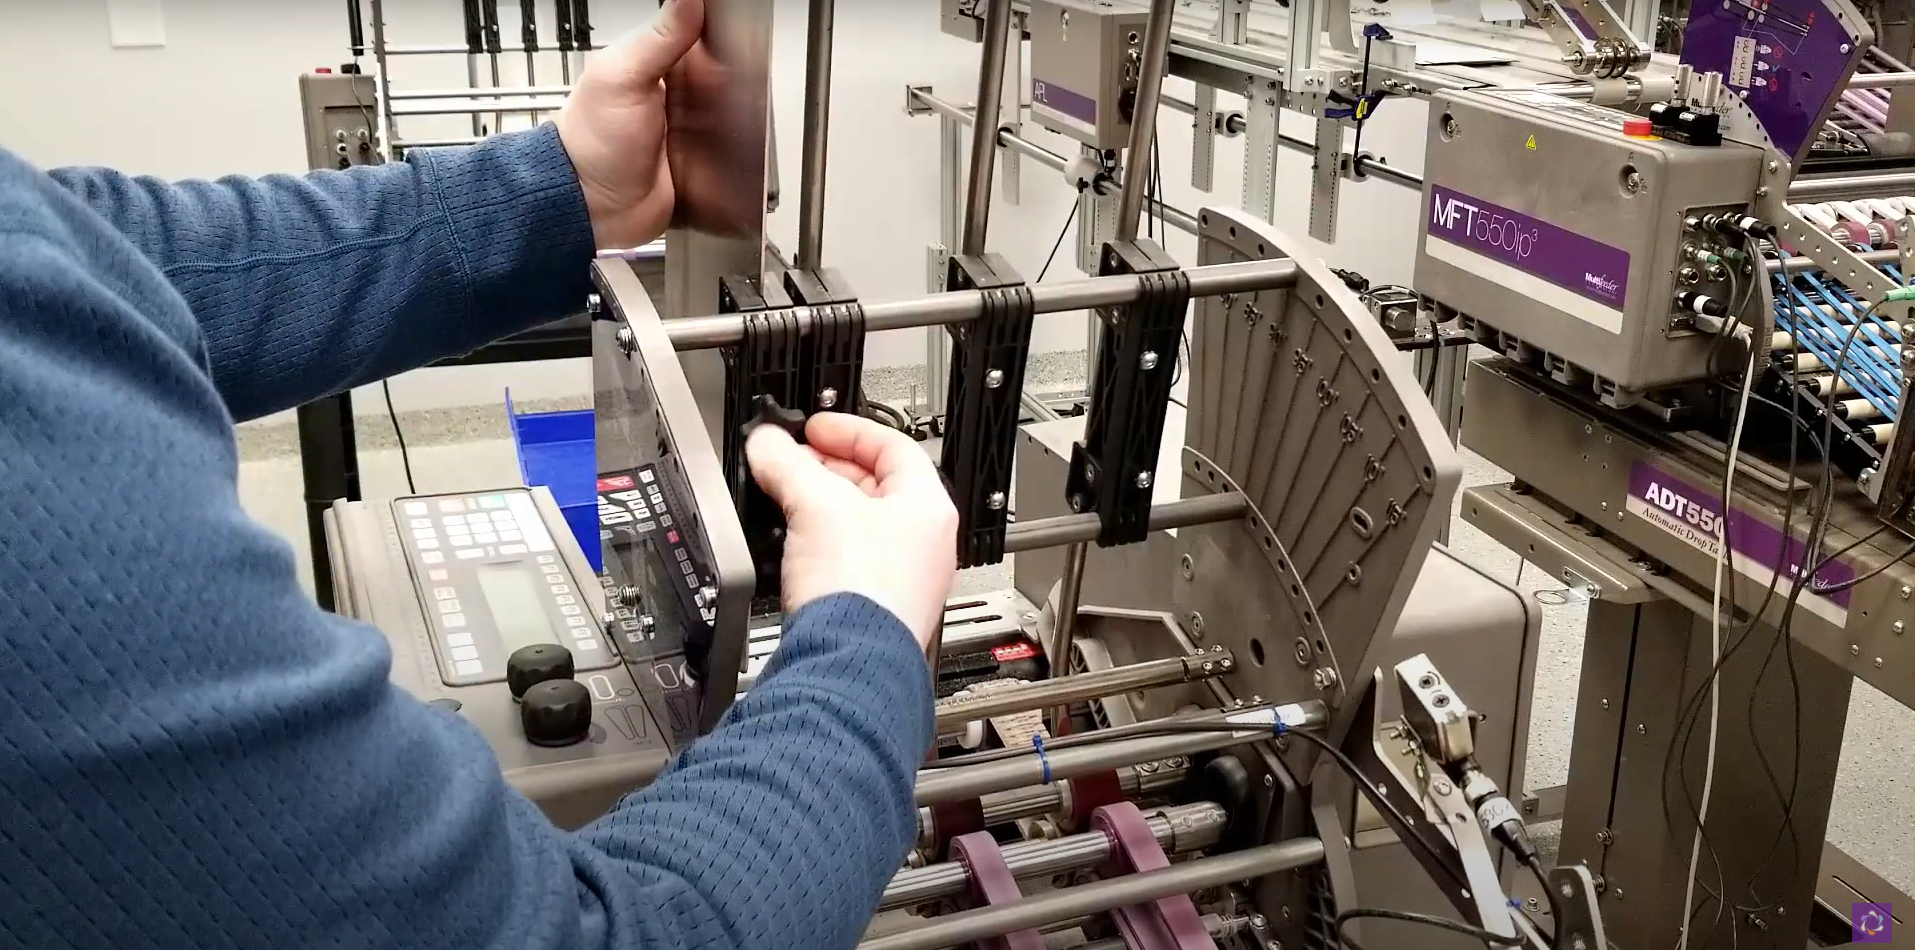
Installing Magazine Side Plates
The two Magazine Side Plates hold the product stack squarely before it goes into the in-feed. It can be installed without tools. Star knobs on the front of the plates loosen and tighten the fasteners of the bracket that hold it in place. The Magazine Side Plate is mounted onto the horizontal rods after the removal of the front portion of the bracket.
.jpg?width=4032&name=Image%20from%20iOS%20(8).jpg)
There are left and right side plates that can be distinguished by their lead-ins, which are supposed to flare outwards from the center of the machine. The Plates also feature a bottom support lip that faces inwards when positioned on the correct side.
To mount the plates, loosen the fasteners with the star knobs on the front of the plate’s bracket. After detaching the front portion of the bracket from the plate, position the side plate on the horizontal rods above the feeder infeed. The specific alignment of the plates depends on your specific product. Consult your Operator Manual (page 29) for more specific guidance on aligning the plates to fit your product. As a general guideline, make sure the plates do not interfere with the feed belt tracks or other parts of the machine. Not only will it be impossible to securely mount the plates if machine parts are in the way but it will also damage the machine.
Installing the Magnetic Catch Tray
The Magnetic Catch Tray is an optional component for MFT Friction Feeders. It is installed at the end of the feeder discharge to accumulate products as they come out for easy operator removal. It is possible to install the Magnetic Catch Tray with just one person but it is recommended that two people work together to install the Magnetic Catch Tray, with one holding the catch try and the other fastening.
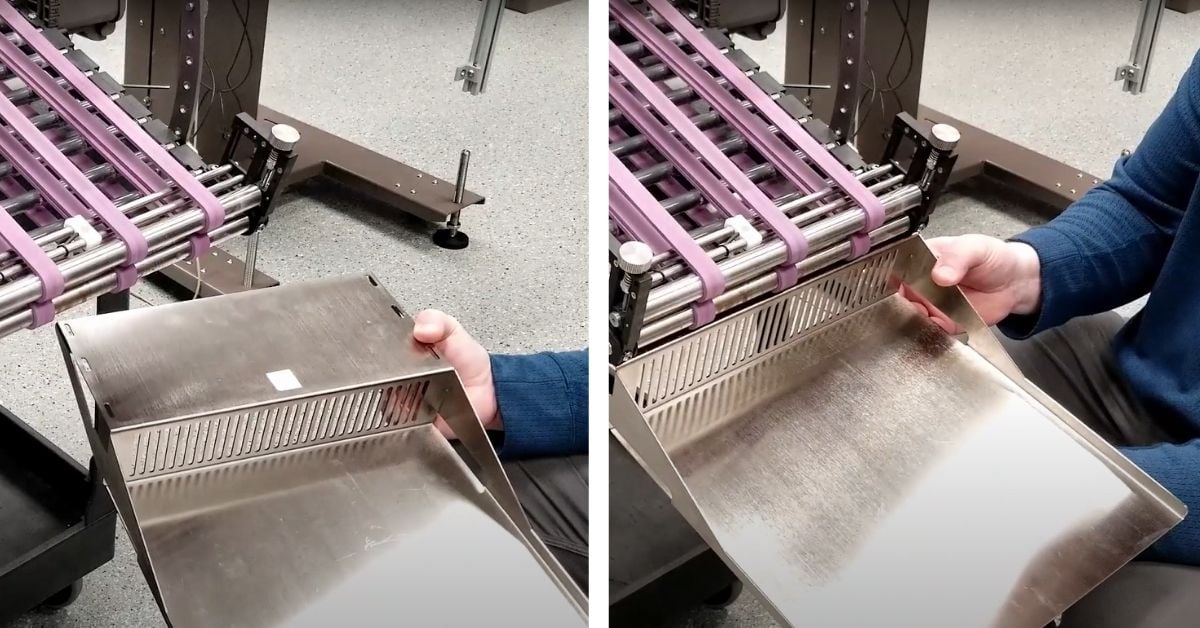
The Magnetic Catch Tray comes with six (6) socket head fasteners for mounting. To tighten the fasteners, a four millimeter (4mm) T-Handle hex key is the recommended tool. The T-Handle is ideal as it provides an abundance of clearance around the catch tray during installation. A T-handle without a ball-end is recommended as it keeps the fastener pointed up on the tool as the threads catch on the fastener.
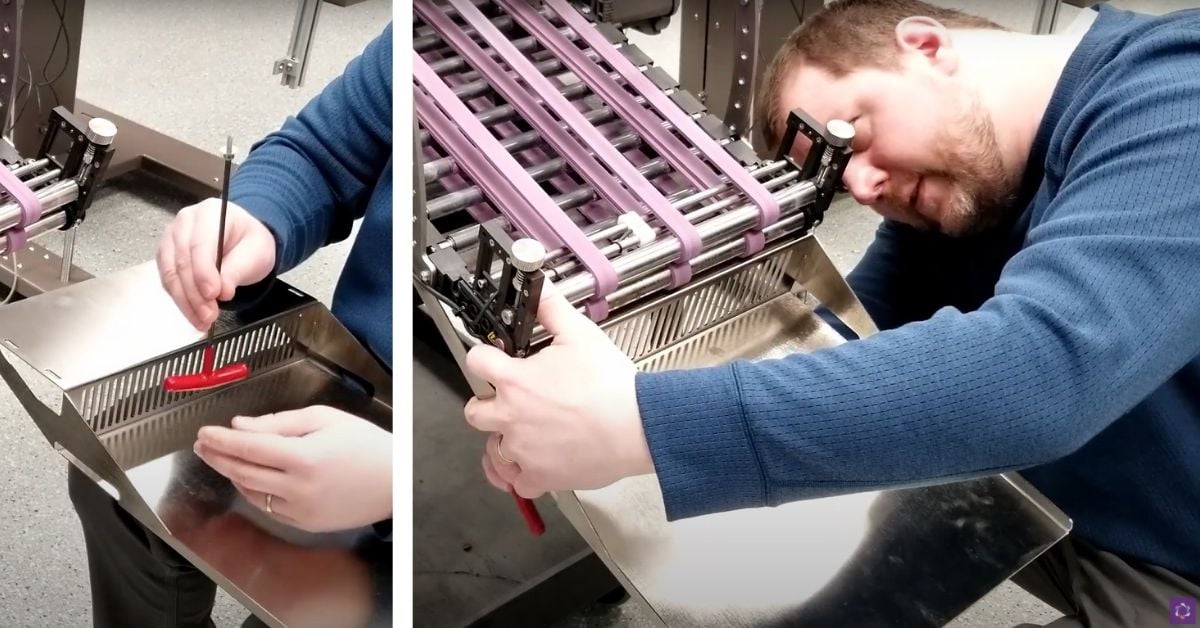
The first step is to line up the Magnetic Catch Tray to match with the pre-drilled holes in the discharge that the bolts will thread into. Place two of the fasteners through the furthest forward clearance slots and the pre-drilled holes. This will help balance the Catch Tray. Tighten the bolts most of the way to attach the Catch Tray to the Feeder discharge. This will allow for adjustments to be made to the position of the Catch Tray without the need for a second person. The Magnetic Catch Tray should be flush at the tangent where the discharge belt turns around the exit roller. It is also important that the catch tray is not crooked and aligned with the discharge. Use a straight edge to ensure the catch tray is correctly aligned.
After properly aligning the Catch Tray, install the remaining bolts to secure the Catch Tray to the Friction Feeder. Tighten the fasteners until there’s no movement in the catch tray and be careful to not overtighten the fasteners. The lock washers should be fully compressed to fully tighten the Catch Tray into place.
Watch the full video tutorial below:
MFT Automation, the parent company of Multifeeder Technology, is a global leader in the design and manufacturing of Friction Feeders, Labelers, and system solutions for the pharmaceutical, food, and print & packaging industries. MFT Automation has dedicated technicians and application managers on staff to answer any questions about your MFT equipment. Whether you have mechanical, electrical, or application questions, your first line of assistance is through our Customer Support Center.
Have questions? Contact our Customer Support Center:
Phone: 651-407-3100 (select option 2)
Fax: 651-407-3199